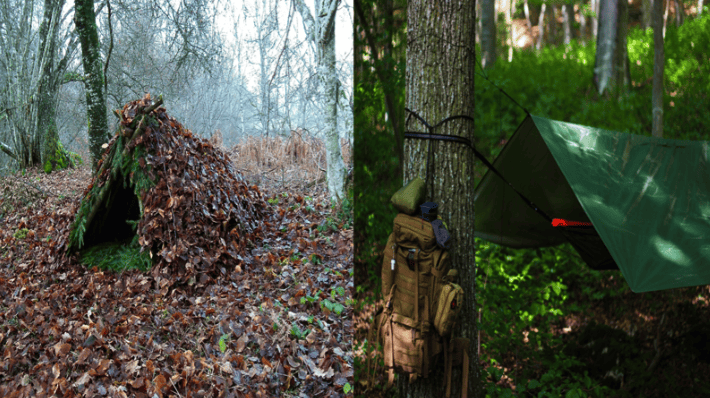
Bushcraft Shelters
-
Save
Share this article: Bugoutbill.com is independent – we research, test, and rate the top products to help you make the right buying choice. We sometimes use affiliate links and may receive a small commission on your purchase. Learn more…
Best Bushcraft Shelters
“The great thing about bushcraft is that wherever you go, the skills go with you” – Ray Mears.
Well, I couldn’t agree more.
There’s this thrill in survival that only you understand.
If you’ve watched survival movies, finding and building shelters is a must because chances are they’d pass due to hypothermia, dehydration, or get eaten by wild animals.
Forgive me if that scares you a bit. Outdoors can be intimidating, but they can be fun and exciting too.
Just go out of your comfort zone! You could’ve got the skills of making Bushcraft.
Moving on…
Bushcraft is an acquired skill and understanding to survive and thrive in a natural environment under different weather conditions.
If you’re someone wanting to be a bushcraft warrior or a veteran – you’ve come to the right place.
And, if you’re wondering about the best shelter – we’re stoked to bring you survival shelters you might want to consider on your next journey, and we’ll be looking at:
- The pros and cons;
- Simple steps to make bushcraft shelter, and;
- Lots more
Let’s get crafty, mate!
Table Of Contents
Table of Contents
Recent posts
Categories
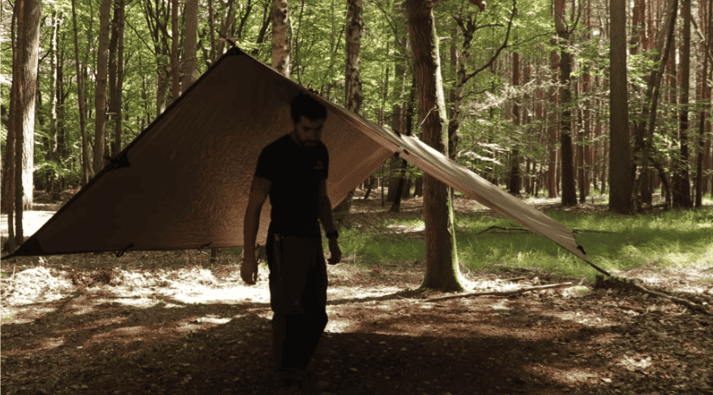
1 - Adirondack Tarp Shelter

-
Save
This bushcraft shelter was inspired by a three-sided log structure popularized in the Adirondack mountains.
It’s developed for fishing, hunting campers and is great for winter camping.
Advantages: It reflects heat towards your body if you have a fire in front of you. There’s also plenty of room to lie down and sit up and warm yourself. You also have the option of having an extendable roof.
Disadvantages: It takes a while to set up, and you’re not left with much material to form a groundsheet, and you can’t stand up inside the shelter.
-
Save
You can manipulate the tarp that offers protection from three sides.
To do this…
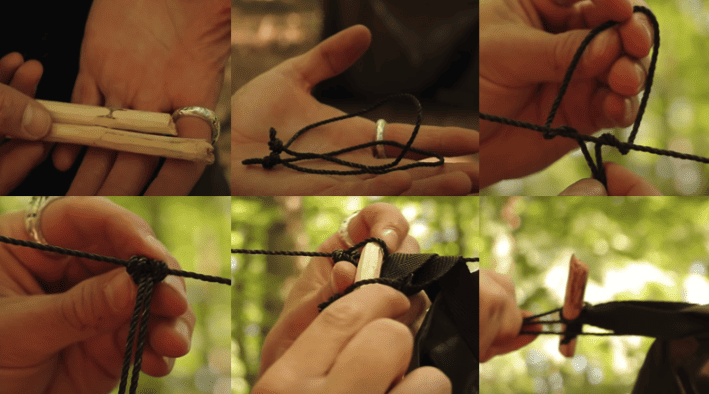
You need to find a good location with two trees, and more could be better. Hook one corner of the tarp over the ridgeline, preferably shoulder length. Prepare a couple of wood toggles of the same length.
You’ll also need to attach two separate pieces of chords creating small loops at the end of ridgelines.
Insert the wood toggles into the loop to stop the knot from sliding. Pull the toggle to tighten the knot. Do this on the other side of the tarp.
Not only that…
Prepare some smaller sticks as pegs to support the back of the tarp and the two furthest tie-up points on the side of the tarp. This way, you’ll create sidewalls for your shelter.
To finish, tie up the remaining corner to a tree to form a roof or flip it back over the ridgeline giving much more room at the shelter’s back.
Related: Best Bushcraft Knives Under 50
2 - Basic Lean To Shelter

-
Save
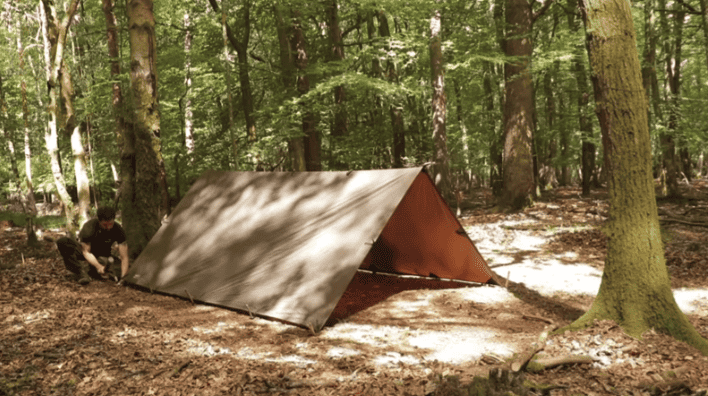
The next wilderness shelter made by tarp is by far one of the easiest to set up.
To make a lean to set up…
Prepare wood toggles. Tie up two endpoints of the tarp but for a more secure tarp, thread the ridgeline through all of the tie-up points on the edge of the tarp.
This involves having to take down the ridgeline and re-tie it.
Now,
All you need to do is peg down the remaining tie-up points at the back of the tarp, and you have yourself a simple lean to shelter that is super fast and easy to set up.
Advantages: There’s plenty of room underneath to store your gear and plenty of airflows if you have a fire.
Disadvantages: It’s not effective if there are strong prevailing winds, and during a cold night, you will be more exposed. Plus, it doesn’t have a groundsheet.
But, good news…
You can rearrange this lean to design into three different types of setup.

-
Save
For example, lower the ridgeline and pull the remaining half of the tarp over it. Keep the tie-up points at the back peg down.
Use two sticks around the head height on each corner of the front of the tarp.
As the support sticks are not pushed into the ground. You’ll need to peg it down using some chord. This way, you can make a lean to shelter with a roof.
This lean to set up is sturdy and gives good visibility of the surrounding forest location. Suppose you have any campfires nearby. The heat will radiate around the inside of the shelter.
However,
It doesn’t incorporate a groundsheet, and it takes a little longer to set up as you need to source the upright stick support.
But,
Suppose the wind changes direction and starts to blow directly into the shelter. You can remove the sticks and peg down the remaining tie-up points.
Related: Best Survival Knife Under 50
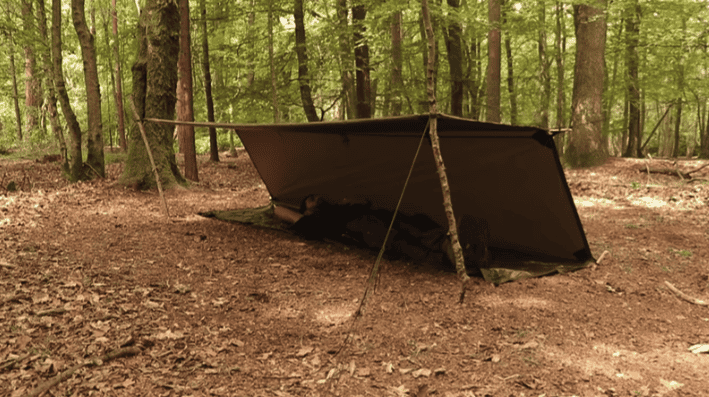
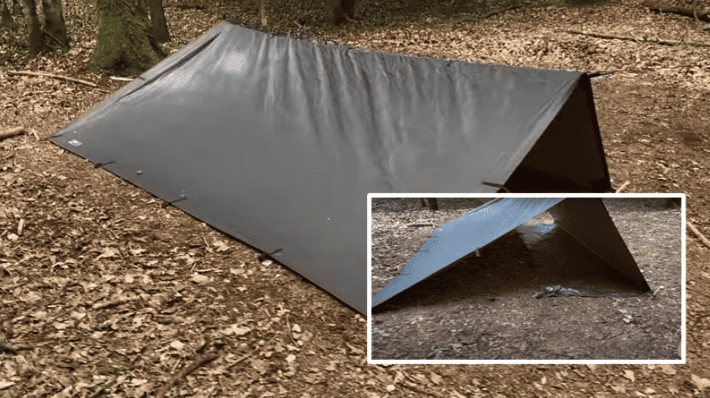
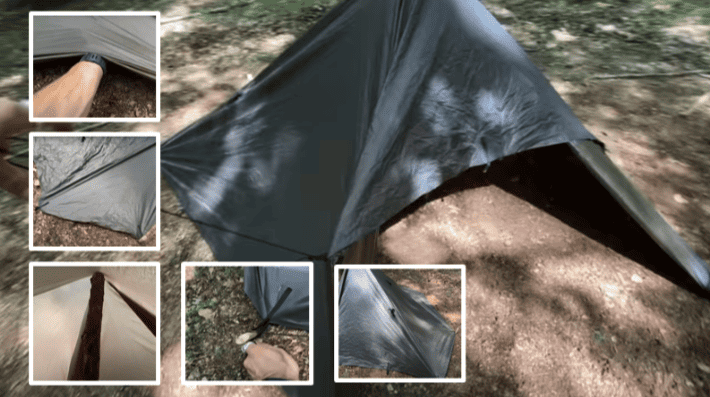
3 - A-Frame Shelter
-
Save
This type of set-up is great for stormy conditions, and you still have plenty of room for your gear. But, you won’t be able to stand up inside it.
You can also do this type of shelter using fallen tree branches, moss, leaves by leaning them on two trees.
Here’s another thing…
You can incorporate a Tarp Burrito underneath this shelter – see photo:
-
Save
Tarp burrito shelter is less than a minute to set up. Simply lay your tarp in a good location diagonally.
Fold the lower part where you’d be placing your feet. Then, fold the sides across. Leave space on the upper area for airflow.
You can place more than one sleeping bag inside the burrito. This is great for body heat during a cold night and stormy weather conditions.
However,
You need to minimize movement due to potential cardiac irritability and maintain C-spine precautions if needed.
Related: Best Bushcraft Books
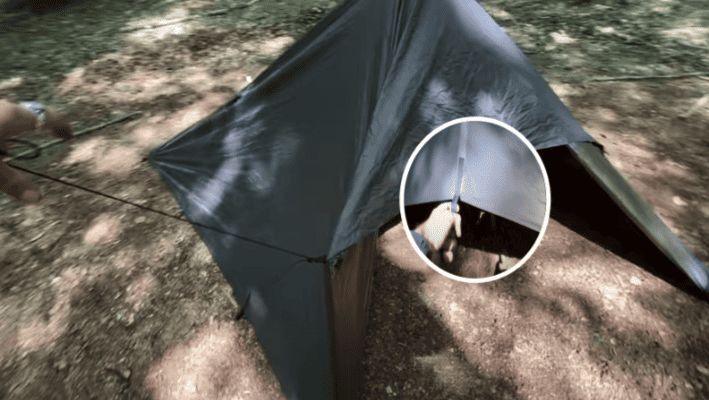
4 - Flying A-Frame
-
Save
If you want to stand up inside a shelter…
The A-Frame can be quickly changed to Flying A-Frame, which means it’s set up by not touching the ground.
All you need to do is undo all of the pegs and tie four guy lines to the tie-up points in each corner of the tarp.
Then, loosen your ridgeline knots and raise them above the head. Tie up each guy line to a peg in the ground using the adjustable guy line hitch.
Now,
Tighten the two toggles at each of the tarps just like in the previous set-ups.
This way, you’ll be free to stand underneath it. You can also set up a hammock if you’d like or a bed made of bamboo.
It’s great in heavy rains and high winds.
Not only that…
You can build a fire inside. Just make sure that your tarp doesn’t catch fire. You can adjust the height of this shelter depending on what you need.
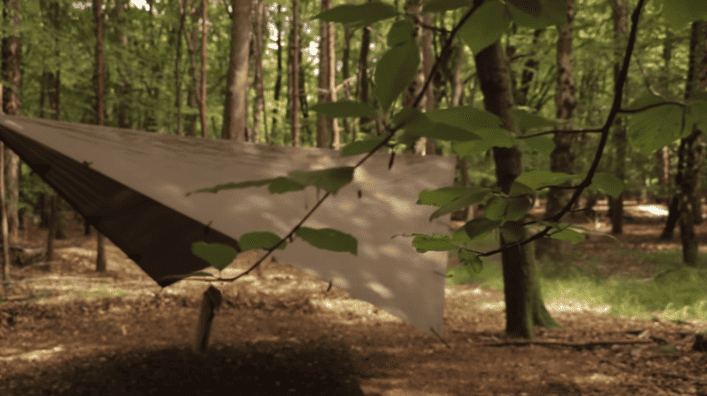
5 - Diamond Fly
-
Save
If you need more room…
Just rotate the tarp so that it hangs diagonally.
You need to tie up two guidelines instead of four. It provides more protection from strong winds and heavy rains.
It also provides more overhang when you’re camping in a hammock and plenty of headroom.
If you want, you could open up one side of the tarp to get a better view of the surrounding location.
Moreover,
Like the previous shelter, you can build a fire and adjust this to whatever height you prefer.

-
Save
Since we’re talking about tarp hammocks…
Here’s an example of a hammock made with a tarp to avoid wet ground and bugs at night.
You can purchase on the market, or you can make yours when faced under a different environment – check this hammock underquilt on the market – here.
6 - C-Fly
-
Save
If your priority is to keep a low profile in the woods or forest…
Hang the top over the ridgeline just like the A-Frame but lower it just below your waist.
Start by pegging up the first tie-up point below the ridgeline and do the same on the opposite side.
Now,
This tarp shelter works better with a smaller tarp, but you can use whatever tarp you have available.
Go around to the shelter’s front and double the tarp under itself to prevent the rain from sitting underneath the fold.
Secure this part of the tarp and do the same at the other end and all you need to do is untuck the remaining tarp to form a groundsheet.
This low profile shelter is sometimes called the C-Fly from the side, and it looks like a letter C.
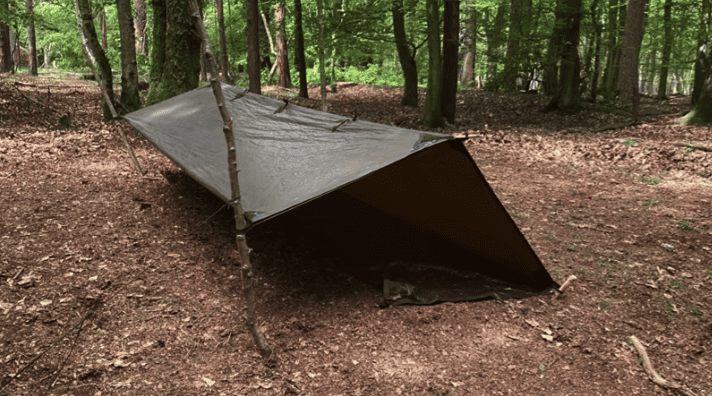
7 - C-Fly Wedge
-
Save
If the weather turns bad and you’re in a storm, you can lower the roof of the shelter to allow greater runoff for rain and protect you from strong winds.
C-Fly Wedge has a wedge-like shape that provides an aerodynamic shape – great for constant prevailing wind direction and rain.
To do this,
Peg down two sides of the tarp and tie the remaining two corners downward toward the ground.
You can use more lines and a less steep angle for open wings and better ventilation.
Tie the last corners down sharply for the best weatherproofing. To create deep basins to catch water, place a few rocks or log chunks under the tarp by the first tie downs.
This shelter is great to cover and protect during warm and stormy days outside.
Unfortunately, you cannot make a fire underneath this type of shelter.
8 - Body Bag

-
Save
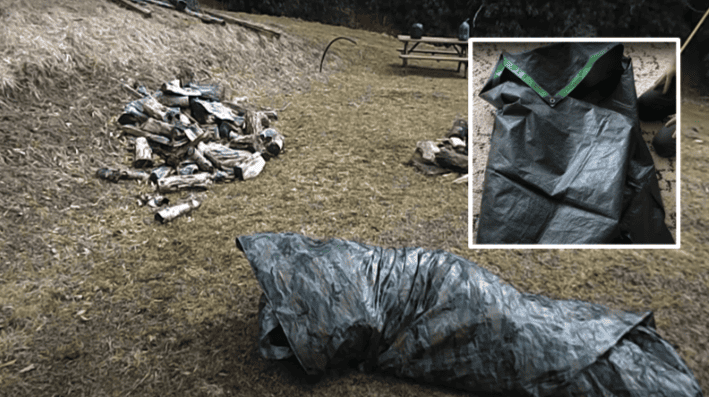
To construct this…
Simply take out the vertical support sticks and peg out each corner of the tarp.
Tuck the leftover tarp underneath the shelter and do the same to the opposite side.
Now, you have a mini A-Frame Shelter with a groundsheet.
Probably the strongest stealth shelter to have during a storm as you are protected from the ground.
However,
It’s extremely restricted, and you can further modify this to give you a little more room inside.
9 - Extended A-Frame
-
Save
To modify the body bag, you’ll have what is called an extended A-frame.
Just unpeg two pegs on one side and pull out what you use for the groundsheet, re-peg this down, and you’ll see that you’ve created a more slanted A-frame which could give you more room for your gear.
This will be a good cover for your body.
10 - Stealth Shelter
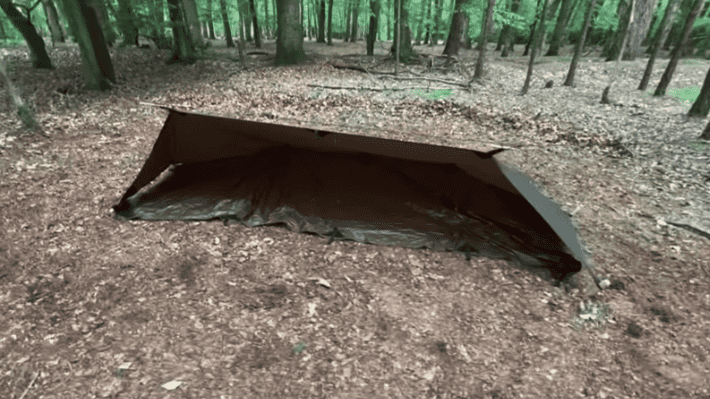
-
Save
This shelter can be used on several occasions…
You need three center tie-up points at one end of your tarp to be near the ridgeline.
Use the wood toggles to secure two ends to the ridgeline. Then peg out the two remaining corners at an angle.
Moreover,
Go around the back of the shelter and tuck half of the tarp underneath itself. Find the next three tie-up points opposite on the ridgeline and peg down the remaining tie-up points.
Remember to keep the tarp tight. Go back around the front of the shelter and pull out the remaining piece of loose tarp to form a groundsheet,
It protects you from the front and back sides and allows you an open view of the forest.
11 - Ground Bivi
-
Save
To upgrade the stealth shelter…
You can raise the tucked groundsheet to form a ground bivi.
Lift the tie-up points you’ve pegged at the back and raise them using a stick and guy line. Do the same on the opposite side and make sure there’s a slight downward shed from your ridgeline for the rain to flow properly.
You will have a remaining tarp that would serve as a groundsheet.
The great thing about this shelter is that you’ll have enough space to store your gear.
12 - Tarp Tipi
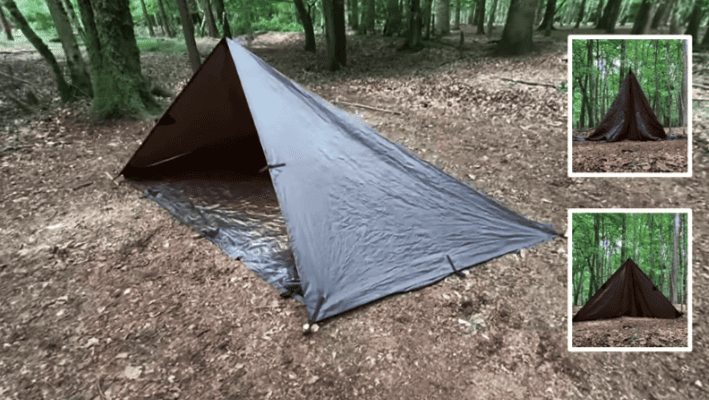
-
Save
If you need a headroom but still want a low profile…
You can make yourself a tarp tipi.
To do this…
Tie up the front middle point of your tarp to your ridgeline and thread it through a tie-up point or attach it with a toggle.
Raise your ridgeline slightly to allow more headroom, and find the second tie-up point down from the center and peg it in. Do the same to the other side.
Then head to the back and peg down the rest of the tie-up points but don’t the very end ones, as this will allow you to tuck under the loose tarp again to create a groundsheet.
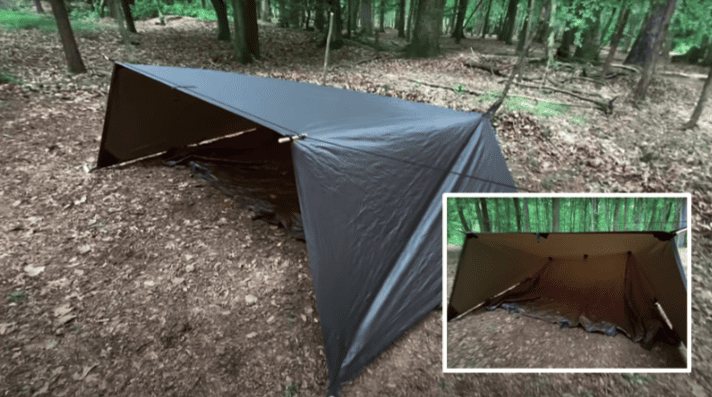
13 - Tarp Tent
-
Save
Most of the tarps we’ve tackled involve the use of ridgelines.
But what if you find yourself needing to set up shelter, but there are no trees, and you’re running out of time?
You need a stick or an adjustable trekking pole.
To start…
Lay your tarp out flat on the ground and go to the back corners of the tarp. Peg out two tie-up points that are immediately next to the corner tie-up points.
Remember, this will be the back of your shelter, so take note of which direction the wind blows.
Tuck the loose corner of the tarp underneath and do the same on the opposite side.
Next,
Go to the front corner tie-up point and find a tie-out loop next to it. Keep your hands on this loop and bring the corner tie-up point to where it was. Peg that corner tie-up point in, then go to the other side of the tarp to do the same thing.
Now, grab your stick or pole and tuck this underneath and into the middle of the tarp. Make sure that if you’re using a stick that the top of it is not too sharp.
Attach two guy lines to the front tie-up points and fold these back on themselves. Tie it around the back corner pegs.
Advantages: It acts as a tent, so it covers plenty of space inside to store your gear and keep dry from the rain.
Because the tarp tent has several angles, it holds out well at strong winds as it deflects it away from the shelter.
-
Save
Disadvantages: The center pole inside can be a little restrictive. If you want, you can tie out the front part of the tarp to help shed rain away in front of the entrance.
Check this tarp tent on the market – here.
14 - Plow Point Shelter

-
Save
You won’t need a ridgeline to make it for this setup, and all you need is one tree.
You don’t need any guy lines and just tie the corner of your tarp to a tree. Peg out the rest of your tie-up points.
Reminder: Don’t stay up too late without building a shelter to prevent an emergency situation from arising.
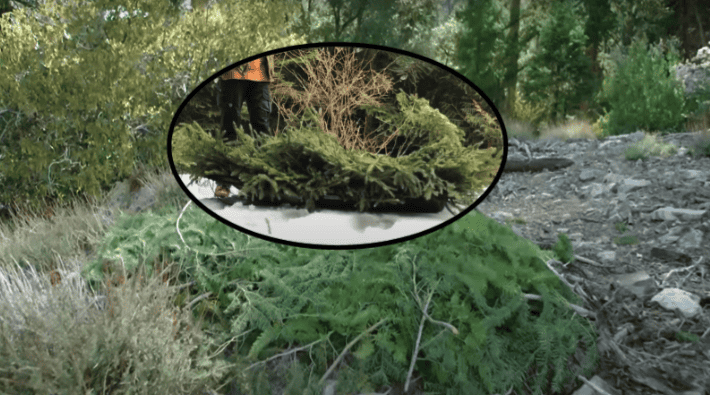
15 - Round Lodge Survival Shelter
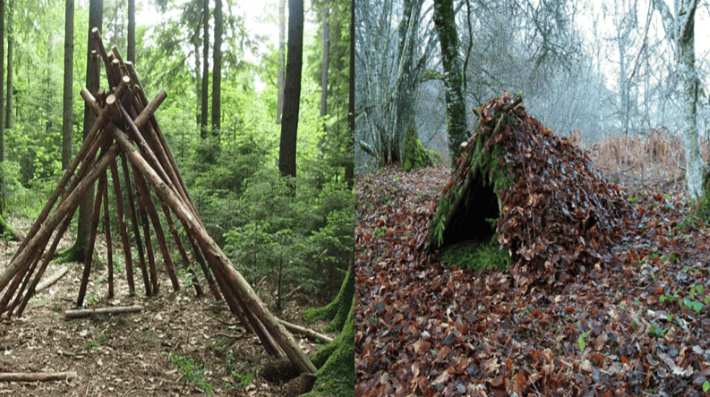
-
Save
Seems familiar?
Round lounge bushcraft shelter design is structured like a tipi, wickiup, and A-frame shelter popularized by Native Americans.
To do this,
You need to gather natural materials like wood from fallen trees, leaf litter, pine boughs, pine needles, tree branches, leafy branches, birch bark, and lots more that would be great to keep you dry inside the shelter.
Here’s the thing…
People forget to measure themselves when they start to build a shelter. This is important because we don’t want our bodies to be exposed at night outside the shelter.
If you camped out during winter, it’s necessary to provide a smoke hole for this particular shelter through the roof to provide oxygen and when you build a fire inside.
Fire is another important element if you find yourself in a survival situation because this keeps you warm inside the shelter.
However,
This could take about an hour to build, plus the gathering of materials. Overall, this survival shelter equally works in wetter climates and can block wind during rainy or stormy weather.
If faced with time constraints, a large tarp can be of great use by going around the structure.
Quick reminder: Just ensure that you camp in a good location without the risk of avalanches, falling rocks, and other elements that could endanger you.
16 - Ramada
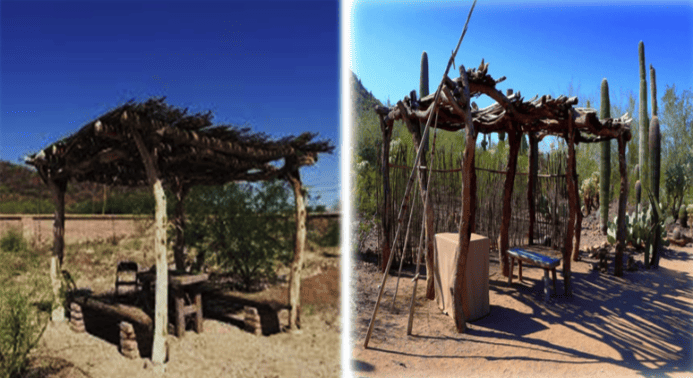
-
Save
This bushcraft shelter offers shade during sunny and hot weather conditions.
However,
The roof design doesn’t guarantee leak-proof rain protection, but it blocks the sun.
Of course, you can use suitable covering like a tarp, mats, pine needles, and more branches that will serve as the roof.
Not only that…
You can also add some removable walls to cut the evening breeze if the temperature cools down.
There you have it. This natural shelter is very versatile, whether it’s a desert or into the woods.
17 - Bough Bed
-
Save
You’re right – this is not a shelter, but it’s amazing to add to your shelter.
So, if you’re stranded in the wilderness without comfortable gear, you can still make your own.
To make a bough bed, you’ll need branches of trees, leaves, grass, boughs, and other plant materials like pine and cedar boughs.
For the bed frame, roll up two logs, side by side and about 3 feet apart. Make sure they are longer than you are tall.
Fill the void between the logs by laying down the boughs, several at a time. Dead, dry leaves or dead grasses can be a great addition if you have them.
The best thing about this bushcraft shelter is that it insulates you on a cold night to maintain body heat.
In snowy conditions…
You’ll just have to stick with the boughs. Make the mattress so thick that you are at least 6 inches from the frozen ground or snow surface when lying down.
If the mattress compresses too much or isn’t warm enough, keep adding armloads of boughs or other vegetation.
Avoid an environment that is prone to flash flooding. Make sure that you also avoid valley bottoms and dips because they act as cold sinks.
Instead, choose flat-level areas without crawling dangerous species, dead branches, and other elements.
18 - Wicki Up
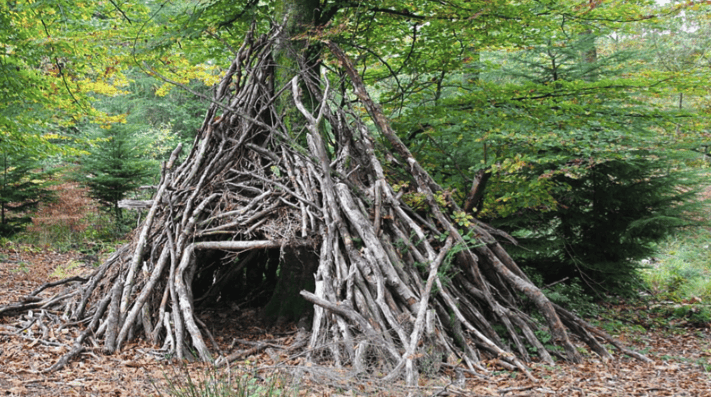
-
Save
This bushcraft shelter looks similar to a tipi made from branches of some fallen tree. You can find this shelter design frequently across the Southwest of America.
Of course, you can upgrade this shelter using outer covering like grass, boughs, and some branches with leaves that won’t fall.
To do this,
After collecting all the needed poles and branches, build a tripod-like structure and lay the other poles around, creating a tipi frame.
Layer the heap of vegetation collected to protect from the sun, rain, wind, and other elements.
You can also build a fire pit inside this shelter. Make sure that you create a smoke hole properly and that the vegetation covering the roof is wet to be safe.
Moreover,
This shelter is suitable for different environments. Even if there’s strong wind or rainy and stormy weather, this shelter will stand strong for your protection.
19 - Quinzhee

-
Save
Since we’ve talked about not only high and low profile tarp setups but also natural shelters.
Let’s now move on to shelter building during snow camping…
Here we see a quinzhee, a dome-shaped snow shelter similar to an igloo but a lot easier to construct – see the igloo photo below.
Here’s the thing,
If you’re more careful in forest or wood camping, making bushcraft made of snow needs more thinking and strategy.
To do this,
You need to pile up snow over your gear covered with a tarp, preferably two feet thick. Next, insert a 12-inch long stick around the dome.
You can use three or four dozen sticks to burrow into the sides of the quinzhee. This way, you can retrieve the tarp and your gear.
Lastly,
Excavate snow inside the shelter until you reach the base of every stick to ensure the uniform thickness of the shelter.
For your ventilation – make a fist-sized hole on the roof of the quinzhee.

-
Save
Igloo is a survival shelter also known as a snow house. This can be a temporary dwelling home for snow campers popularized by Eskimos.
Eskimos are Canadian and Greenland Inuit.
If you’re wondering – here’s how an igloo keeps you warm – here.
20 - Snow Cave
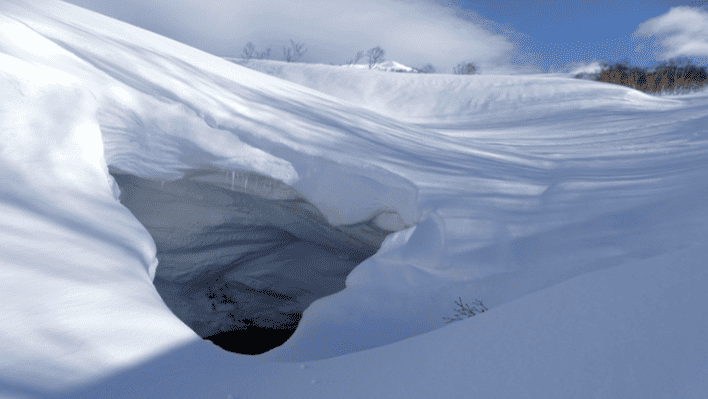
-
Save
This survival shelter can be made in areas with deep snow. As you can see, it does look like a cave.
And since you’ll be building this shelter in deep snow – you need to be extra careful because campers might suffer from low oxygen or even be buried alive when the ceiling collapses.
For this reason,
A good location is a critical part of building a snow cave for safety.
First, select a deep and solid area and dig into its side to form a tunnel into a low spot.
You can call this low spot cold since it’s where the colder air can fall and collect.
From here,
You need to dig up to create further a platform to sleep on, preferably the highest part of the shelter.
Dig a small hole on the roof to provide ventilation, especially if you plan on blocking the entrance with a doorway using gear or a big chunk of snow.
Review Section
As you notice, taking a tarp on any bug-out adventure is a lifesaver because it can be used for several purposes.
Here are some recommendations that you might want to opt into purchasing tarps.
Multi-Purpose Blue Economy Poly Tarp
These are cheap poly tarps, lightweight, mostly waterproof, and weatherproof. If you want to practice your bushcraft skills, this will come in handy for you.
You can also bring this into the wild…
But, if you want to have an ultra-light adventure, I wouldn’t recommend this tarp.
However,
It can be very useful, especially when you don’t want the trouble of bringing sleeping bags. You could turn this into a burrito tent or even an additional groundsheet and cover your bushcraft shelter.
The materials for this tap weigh less but are on the expensive side. If you frequently do bushcraft, this could be your choice of tarp.
It comes with 13-23 webbing loops that will come in handy for different styles of tarp shelters you want to build – this tarp has all the angles covered for you!
Moreover,
With the unexpected weather conditions – you can expect this tarp’s resilience and durability to changing weather.
And what’s more exciting is…
AquaQuest products are backed with a lifetime warranty. So, if anything happens with the tarp, you have a replacement assurance anytime.
Conclusion: Survival Shelters: Best Bushcraft Shelters
Now you too can have one of the best shelters created by your new found skill and understanding of shelter building.
I’m sure you’ve learned so much about shelters.
Going back to the quote from Ray Mears…
“The great thing about bushcraft is that wherever you go, the skills go with you.”
Survival skills are important when you’re in the wild experiencing different environments.
But to make a bushcraft shelter or natural shelter for every great outdoors, you plan to go to – you need to practice hard to acquire the skills and determination.
If you’re not confident doing it alone…
You can learn from someone you know and be each other’s mate in the wilderness.
Nothing is impossible.
Check out Lawson Hammock Blue Ridge Camping Hammock and Tent – here.
Similiar Posts
Community Cuisine: MREs and Grassroots Food Movement Engagement
Interested in the connection between community cuisine, MREs, and the grassroots food movement? This article
The Future of Food: MREs and Their Contribution to Systemic Change
Meal, Ready-to-Eat (MRE) is a convenient and portable food option that has been gaining popularity
On the Frontlines of Food Change: MREs in Food System Transformation
In a context where food system transformation is a prominent topic of discussion concerning sustainability

-
Save
About Author
Lorem Ipsum is simply dummy text of the printing and typesetting industry. Lorem Ipsum has been the industry's standard dummy text ever since the 1500s, when an unknown printer took a galley of type and scrambled it to make a type specimen book. It has survived not only five centuries, but also the leap into electronic typesetting, remaining essentially unchanged.
Author Name -

-
Save