How To Make A Paracord Bracelet
-
Save
Share this article: Bugoutbill.com is independent – we research, test, and rate the top products to help you make the right buying choice. We sometimes use affiliate links and may receive a small commission on your purchase. Learn more…
Overview
You must have finally learned the hidden purposes of these thick and rugged “rockstar bracelets,” the paracord survival bracelet.
This accessory is more than just a fashion statement. In case you still don’t know, it can let you walk around with feet and feet of a cord that has the capacity of over 550 pounds… without looking like a freak!
And it’s not hard to make.
Below, I’ll show you how I make my paracord bracelets (which I have lots of right now) along with important tips and tricks that you can arm yourself with for any survivalist situation or a busy crafting weekend.
So without further ado…
Materials
The materials are all simple and can be bought from a nearby store. Or most probably, you already have them stored at home.
- Paracord of your choice (ideally ⅛ inches in diameter)
- ¾ inches paracord buckle
Tools:
- Lighter, wood-burning tool, or anything to melt the cord’s tip off
- Scissors
- Paracord needle or hemostat (this is optional in case you don’t have any burning tool)
Table Of Contents
Table of Contents
Recent posts
Categories
Directions - Choose Your Color(s)
-
Save
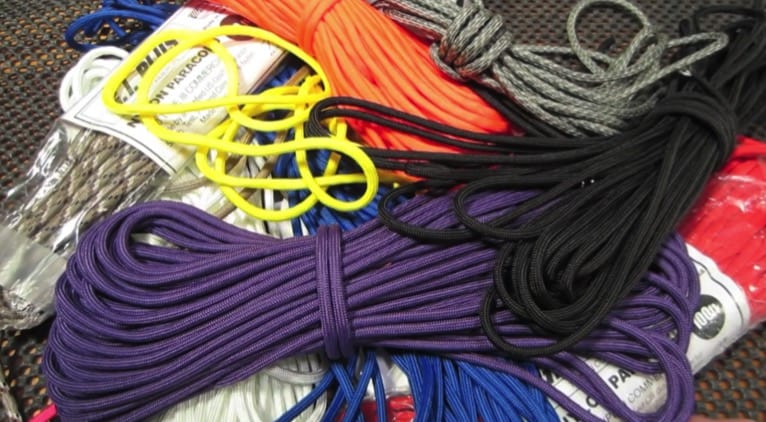
The first step is to choose and prepare your paracord. If you still don’t have one, you can get them at your local hiking or outdoor store. These paracords are available in a wide range of types, designs, and colors for you to choose from.
Now, you can choose your color.
In doing so, you might also want to consider the expedition or trip you’re using it for. If you’re out fishing and you just want to have an extra cord at hand, try the more muted and neutral colors that are perfect for catching fish smoothly.
On the other hand…
If you’re out hiking and going into the wild, you can also opt for a colorful paracord bracelet, especially if you want it to be seen clearly and easily.
And remember: Be mindful of the type of cord you’re getting, as well. Some cheap ones could come with one single strand of rope and it certainly won’t prove useful or helpful to you in a survivalist situation (More on paracord types later.).
You may construct your bracelet with just one or even two colors. How you’ll be able to attach the buckle might also depend on your cords, as well as the amount of each cord color to measure.
Related: How To Build A Bonfire
Measure your wrist
-
Save
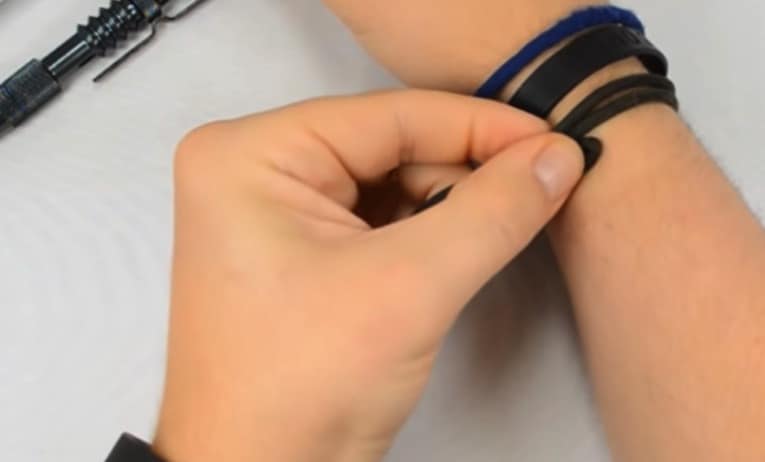
You must not forget this step because it will determine the comfort you’ll have with your paracord bracelet.
Measure the circumference of your wrist with your ten or eleven feet long cord and then mark the measurement.
Then just measure it against a ruler and you’re all set to craft.
Measure Out Cord
-
Save
In case you’re using just one color of cord, multiply the wrist measure you’ve taken earlier by 12. This is because you’ll be needing more cord than if you’re using more colors.
Now, if you want to use two colors, multiply the measure by 6. The product will be the measure of the length of cord that you’ll need.
You can also add up to around 6 extra inches if you want to be safe and sure.
Related: How To Escape From Handcuffs
Attach Paracord To Buckle
-
Save
Before measuring your paracord bracelet, you can attach your buckle first. I usually use THIS metal paracord buckle because they’re available in different tones even though they’re all metal, which is really cool.
But I also have a stash of the colorful ones (like these babies) if I am making one for children and women or if I just like to go with a certain aesthetic (because why not?).
Now…
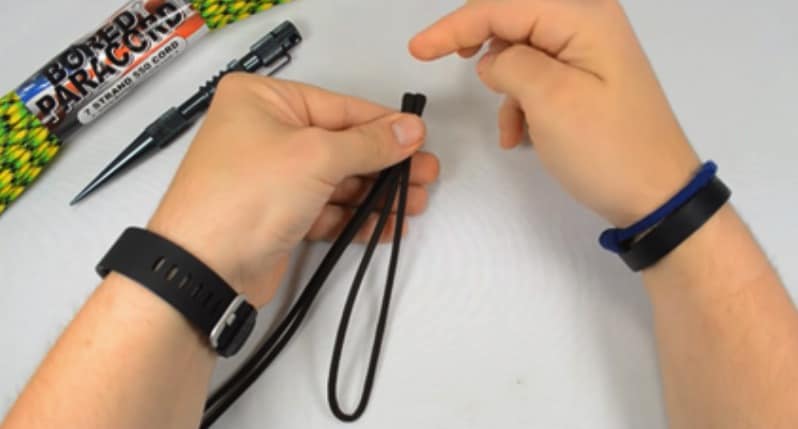
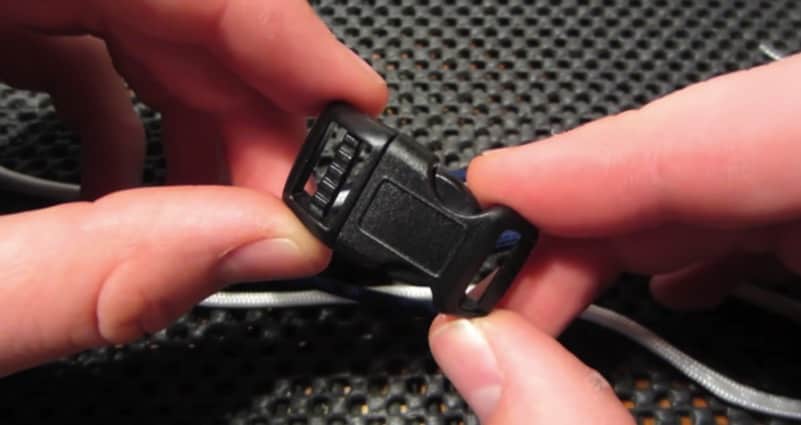
Fold your cord with the two tips together so you can find the center point. Now you have a loop at the other end. Push that loop through the release buckle so that it sticks out at least an inch or so.
Now, go back to the other end, the loose ends, and thread them through the loop and pull the cord against the release buckle until you’re satisfied with the knot’s tightness.
Determine Bracelet Length
-
Save
Now, you’ll be taking care of the second buckle part this time.
Hold the loose ends and thread them through the side release buckle. Then you can measure again against the ruler, now including the buckle. But you only have to include one buckle piece in the measurement and exclude the male prongs.
Now that should be your initial measurement plus one inch and that should be a snug and comfy fit.
Weave The Main Bracelet
-
Save
And now we weave.
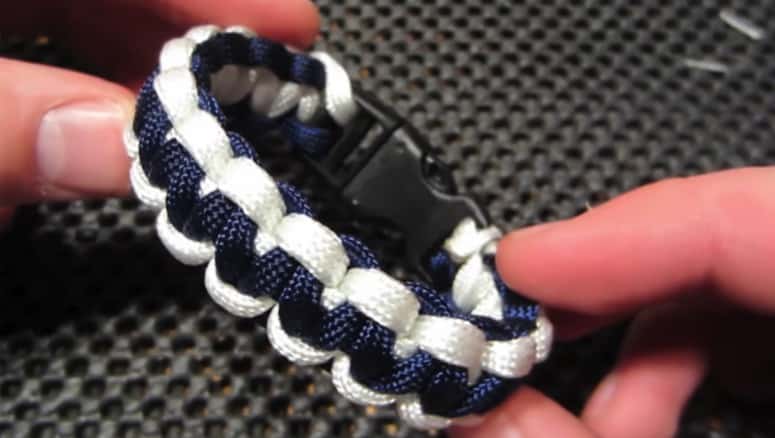
This paracord bracelet weave is the cobra weave or also called the Portuguese sinnet or Solomon bar.
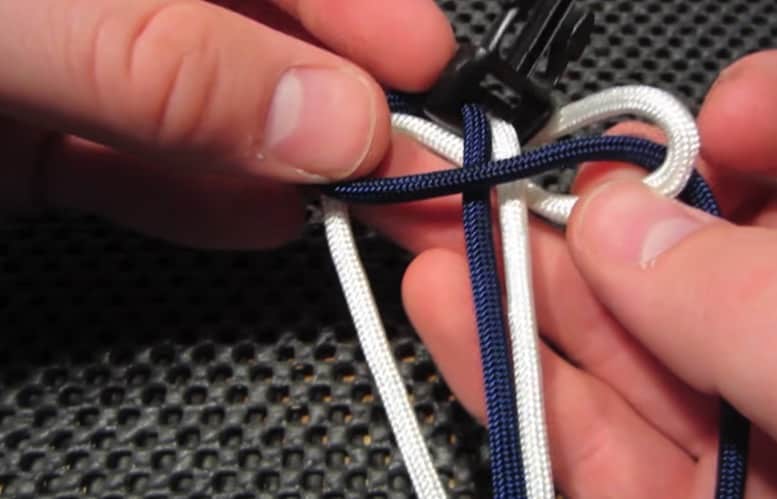
To do this basic and popular cobra paracord bracelet weave, start with taking the left cord and placing it beneath the middle or core strands, going between the buckle ends.
Note: You can also tape the first buckle end to the surface you’re working to hold the bracelet for you and keep it from moving as you weave.
Now take the right cord underneath the left side cord, now going over the center strands instead of beneath, and then going through the left loop.
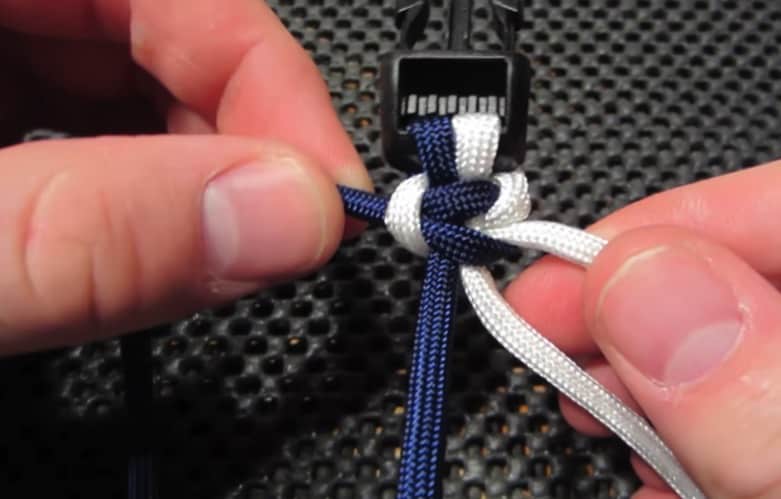
Now you have a half cobra knot. Tighten it up so it’s snug against the buckle above.
Next up, get the right side cord and take it underneath the center strands. Do the same with the left cord going underneath the right cord and then over the center strands and through the small loop.
Continue doing this cross knot, alternating sides as you go. If you unconsciously fail to alternate, you’ll notice an odd twisting of your knot. Just undo that knot and alternate again.
Also, make sure…
To keep a consistent amount of tension for each knot so that they would be uniform with one another with the same size.
Repeat the steps until you’ve finished a whole braided bracelet.
-
Save
Finish
After finishing your paracord bracelet braid, it’s time to tuck the babies in!
First off, trim the excess cord that’s closest to the last knot that did. You may trim one at a time if you want to be extra careful.
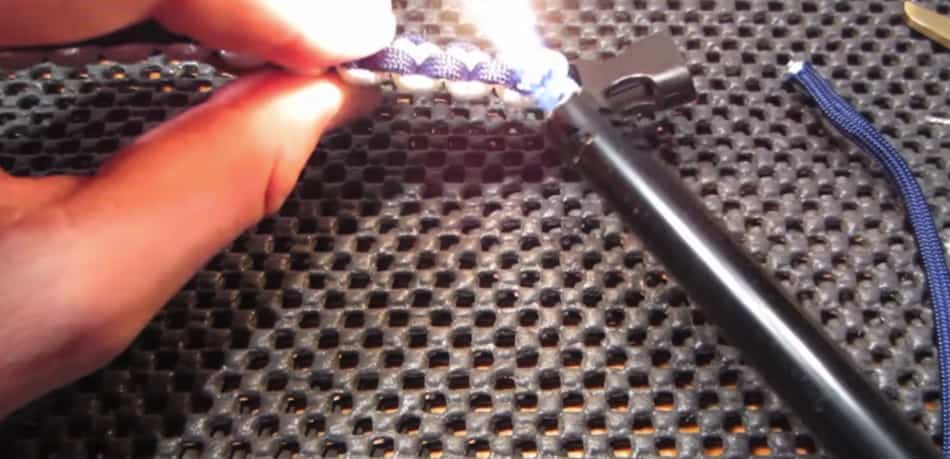
Now light it up.
No, not put it on fire! Use a lighter or any hot object such as a hot butter knife, the side of a lighter, soldering iron, or a wood-burning tool to melt the ends of the cords off. (If that wood burning tool is too much for you, I also have this simpler one that I also use with most of my DIY projects as it’s easier and safer to hold than a lighter).
The idea is to melt the ends so they’d be solid enough to not unravel into many different strands.
After putting against your heat source, pinch or press the ends onto the surrounding cord with your finger but be careful because it’s most probably still hot (that’s where a good wood-burning tool comes in).
But if you don’t care that much for a heating element…
You can also use a paracord needle or hemostat to tuck the ends of the last knot before trimming the excess ends to finish it off.
It’s not as secure as burning the ends but it’s safer and easier. And it’s hardly noticeable, too!
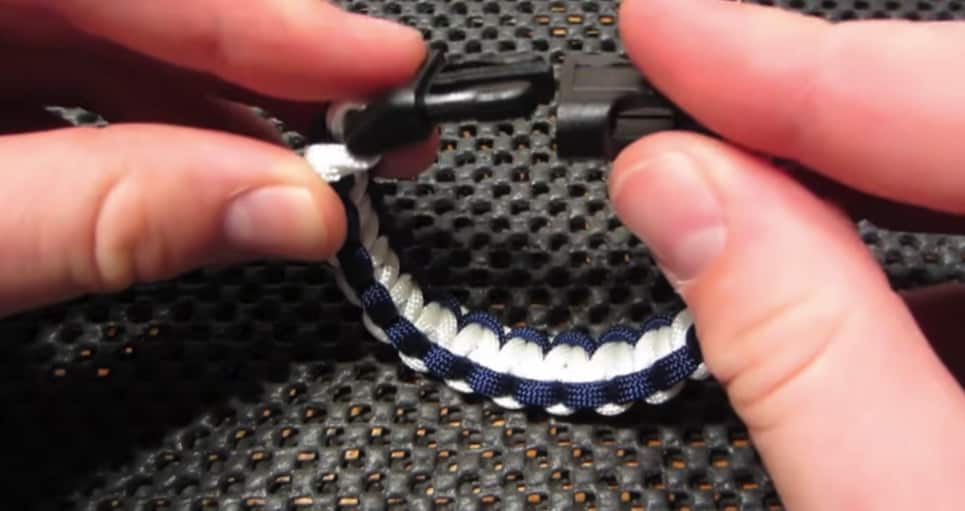
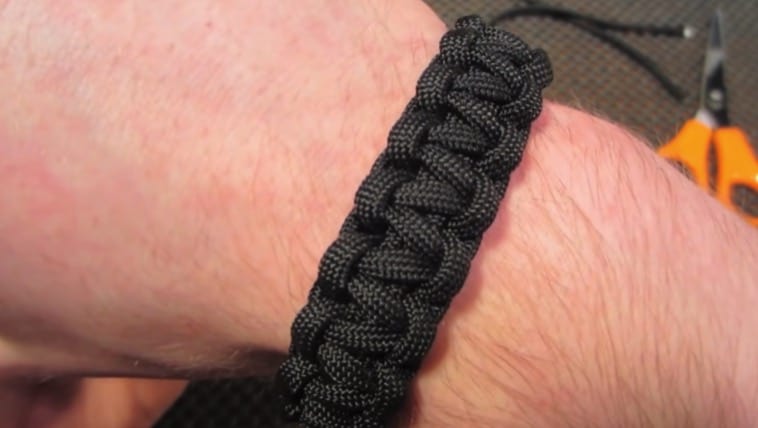
You’d know you’ve done the steps right if your knots look like the one in the picture. Once you get the hang of it, you may adjust the quantity of the cord you’re using by tightening or loosening the knots and pulling them closer together as you go.
Pro tip: If the side release clasp on your paracord bracelet is larger than usual, you may also loop the paracord around it again before you begin weaving to fill in the extra space by the buckle.
The 1/2″ side release buckle components are a tight fit, but they’ll do, and the 5/8″ size is just quite perfect.
-
Save
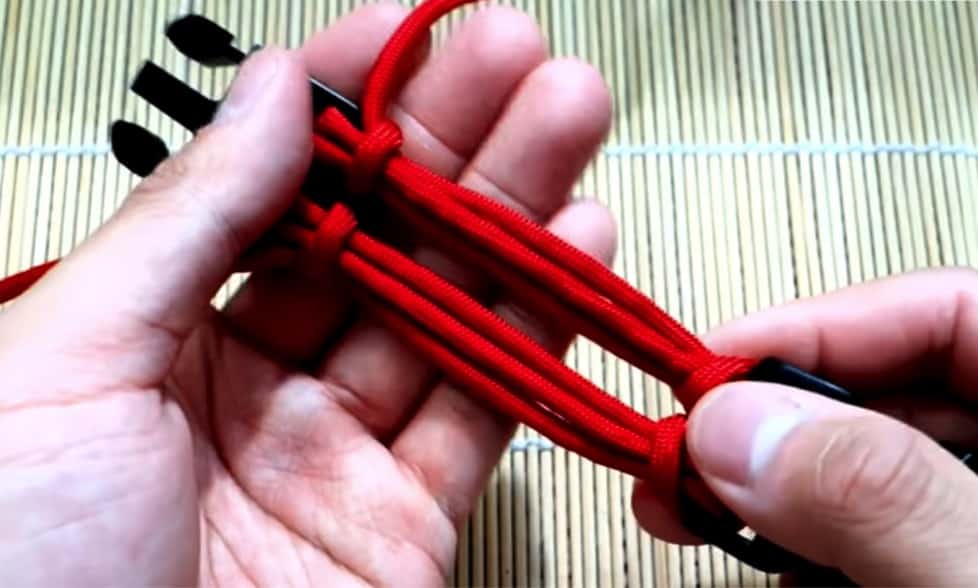
Now, when you start weaving, you already know by now that you’ll be left with a core of two strands of cord.
What’s cooler is, you can also do a four-stranded core paracord bracelet!
To do this, wrap the cord twice on the second buckle end as you start with lark’s head on the first buckle tip, and then thread your paracord right back to and over the tip of the first buckle and now you can start weaving with a core of four-strand cords.
Alternatively…
If you want a thicker six-strand center, make a lark’s head knot by the first buckle.
-
Save
Now, thread the two strands around the second buckle (at your wrist size), then back to and around the first buckle (which now has four strands around it), back to and around the second buckle, and then begin knotting over and under your six-cord center strands.
The result is a much thicker paracord bracelet if you don’t mind having that on your arms. But the advantage of it is you’ll have more cord in your person in case of emergency.
Types of Paracords
-
Save
If you’re serious about having a stash of paracord bracelets in your survival bag, you also have to make sure that you’re using the right cord because there could come a time when your life might depend on it.
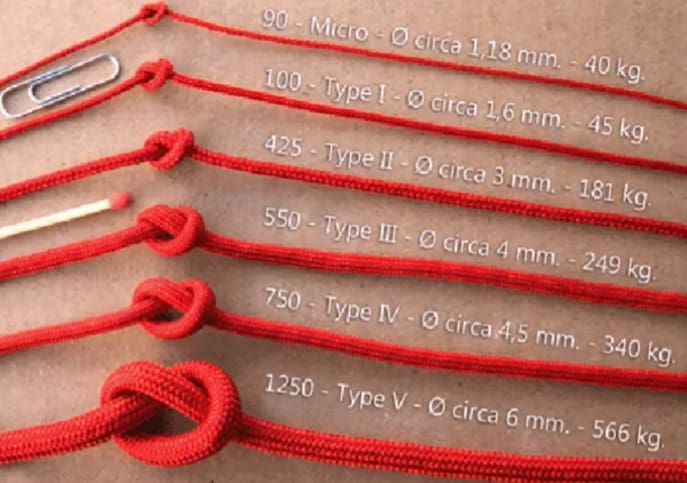
Below are the types of paracords and their strengths so you’ll know which one to get.
- Type I: The type I paracord is the most inexpensive of them all. That’s because it only has a single strand of yarn as its core. Given that, it’s not exceptionally strong with a minimum breaking strength of 95 pounds, which isn’t bad either. In case you’re wondering, you can use this for lighter tasks such as fishing.
- Type II: It has around 4 to 7 yarns at its core so it’s somehow strong. It has a minimum breaking strength of 400 pounds.
- Type III: The third type of paracord is also where the cord’s nickname is from. A paracord is sometimes called the 550 Paracord after the Type III paracord with the minimum breaking strength of 550 pounds. It’s the go-to cord of campers, hikers, and outdoor enthusiasts as it’s strong, versatile, and also affordable. Its core is made up of around 5 to 9 yarns in its center.
- Type IV: Obviously, this type is much more expensive than the Type III paracord as it has a minimum breaking strength of 750 pounds, making it perfect for making tents and other heavier tasks. But most of the time, it’s not really a necessary part of the regular camper’s gear.
-
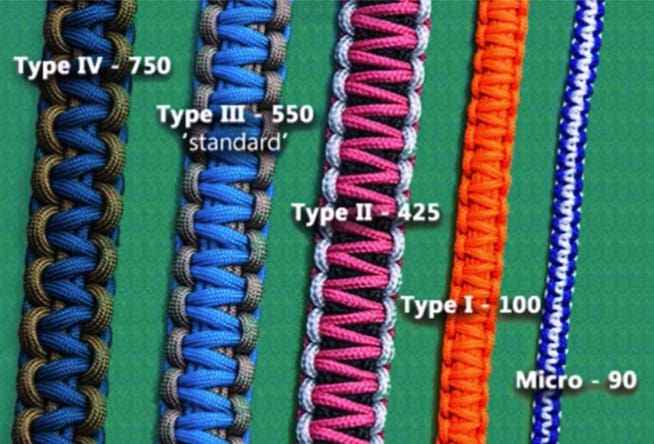
Save
As Type III paracord is the most common type among outdoor enthusiasts, it’s also the easiest one to find and buy.
But if you want to be extra safe and serious, you can also get a military-style paracord which usually has seven 3-ply yarns made of nylon. Not only is it good for holding things together but you can also use it to make a good fire as it’s perfectly flammable, too.
On the other hand…
If you’re just starting out with using and making paracord bracelets, or if you’re looking to gift your friends or colleagues a handmade one, just get a good paracord kit that’s complete with a good quality cord and buckles (now, if you’re now used to making them and want to step up your game, you can also use a more advanced paracord bracelet kit complete with a paracord jig frame, carabiner, and fittings!)
Conclusion: How to Make Paracord Bracelets
-
Save
Not as hard as it seemed to be, is it?
And the best thing of all?
The materials are all easily available or accessible, which is just right as what we’re making is something that we can use in survival situations.
You’ll never know when you’ll be needing a good tough cord.
A well-made paracord bracelet can even save your life because it can actually cut a zip tie! Although it will most probably take some time and isn’t instant, the point is, you have something with you that you can utilize in so many ways.
And that’s just the tip of the iceberg, really. And not to mention, it looks quite good on the arms as well!
Once you’ve mastered the basic king cobra knot, you can also try other varieties and have fun while you’re at it!
Similiar Posts
Community Cuisine: MREs and Grassroots Food Movement Engagement
Interested in the connection between community cuisine, MREs, and the grassroots food movement? This article
The Future of Food: MREs and Their Contribution to Systemic Change
Meal, Ready-to-Eat (MRE) is a convenient and portable food option that has been gaining popularity
On the Frontlines of Food Change: MREs in Food System Transformation
In a context where food system transformation is a prominent topic of discussion concerning sustainability

-
Save
About Author
Lorem Ipsum is simply dummy text of the printing and typesetting industry. Lorem Ipsum has been the industry's standard dummy text ever since the 1500s, when an unknown printer took a galley of type and scrambled it to make a type specimen book. It has survived not only five centuries, but also the leap into electronic typesetting, remaining essentially unchanged.
Author Name -

-
Save